I've only been learning and doing quilting for the last couple of years. Even though I love to sew and have delved into many many many sewing crafts, I never gave quilting a try. I just thought it wasn't for me. Then a friend of mine said to me try it Fil, you will love it, with your OCD and mathematical mind you will be addicted in no time. Guess what? She was right. I am now addicted.....
So I was off making HST 2 at a time. Recently I was taught another technique where you get 8 HST at a time. I was so excited. So I am going to share both techniques with you today.
Technique 1..... 2 HST

Items you will need :
Cutting mat
Rotary Cutter
Quilting Ruler
Pencil
2 squares of your choice. (In this tutorial I have used 10"squares)
If you want your finished block to be a particular size you need to add 7/8" to the finished size to make your squares. eg. If you want the finished size to be 4" you will need to cut your squares 4 7/8" square.

Place your fabric right sides together. Using your pencil and ruler draw a line from one corner to the opposite corner.

Using your 1/'4" foot sew a scant 1/4" line on either side of the pencil line you drew. Use the guide on your foot to travel long the pencil line.

You should then end up with a sewn line on either side of the pencil line.

Using your rotary cutter cut along the pencil line. You will then end up with 2 triangles.

Press seams open with your iron and trim to final size. And your done.
Technique 2 ..... 8 HST
Now this is the technique I only recently learnt and my favourite especially when you are making lots of HST's, this is a great time saving method.
You will need the same equipment as above.
There is a formula to work out so that you get the exact size you need. If you need you unfinished HST to be 41/2" and 4" finished you will need to follow this formula.
Unfinished size x 2 + 1 eg. 4 1/2" x 2 + 1 = 10"
or if you need each block to be 5" finished it will need to be 5 1/2" unfinished.
therefore: 5 1/2" x 2 + 1 = 12" you will need your initial squares to be 12" in size.
(I hope I haven't confused anyone and don't be afraid to ask any questions.)
Choose your two fabrics. I have chosen 2 pieces 10" square in size. Place your fabrics right side together.
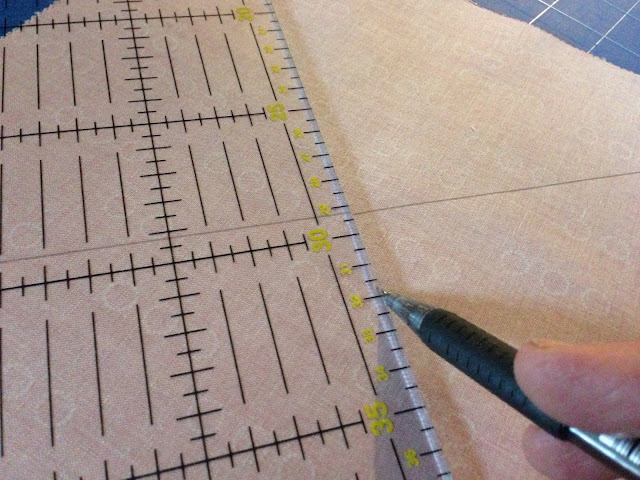
Using your pencil and ruler draw a line diagonally from corner to corner in both directions.

So that you end up with a cross through the centre.

Using your 1/4" foot sew a line on either side of the pencil line you drew.

Place the fabric onto your cutting mat square with the grid lines. Using your rotary cutter cut along both diagonal pencil lines, without moving the fabric off the mat.

Using the grid lines as a guide cut vertically through the centre and then again horizontally. Cut all lines without moving the fabric off your mat.


You will then end up with 8 Half Square Triangles.

Press seams open.

All you then need to do is to trim your squares to size. If you have measured accurately all you will need to do is cut off the dog ears.

Using 10" squares you will end up with eight 4 1/2" HST.


There are endless ways you can arrange you HST. I'm really liking these little pin wheels.
Hope you have enjoyed following this little tutorial and have some fun making HST.
 |
| Second quilt I had ever made........ |
I found a pattern online and it required HST. I sat there for ages to work out what those letter meant. Thank goodness for Google... or I'd still be there..... (in case you are like me Half Square Triangles)
So I was off making HST 2 at a time. Recently I was taught another technique where you get 8 HST at a time. I was so excited. So I am going to share both techniques with you today.
Technique 1..... 2 HST

Items you will need :
Cutting mat
Rotary Cutter
Quilting Ruler
Pencil
2 squares of your choice. (In this tutorial I have used 10"squares)
If you want your finished block to be a particular size you need to add 7/8" to the finished size to make your squares. eg. If you want the finished size to be 4" you will need to cut your squares 4 7/8" square.

Place your fabric right sides together. Using your pencil and ruler draw a line from one corner to the opposite corner.

Using your 1/'4" foot sew a scant 1/4" line on either side of the pencil line you drew. Use the guide on your foot to travel long the pencil line.

You should then end up with a sewn line on either side of the pencil line.

Using your rotary cutter cut along the pencil line. You will then end up with 2 triangles.

Press seams open with your iron and trim to final size. And your done.
Technique 2 ..... 8 HST
Now this is the technique I only recently learnt and my favourite especially when you are making lots of HST's, this is a great time saving method.
You will need the same equipment as above.
There is a formula to work out so that you get the exact size you need. If you need you unfinished HST to be 41/2" and 4" finished you will need to follow this formula.
Unfinished size x 2 + 1 eg. 4 1/2" x 2 + 1 = 10"
or if you need each block to be 5" finished it will need to be 5 1/2" unfinished.
therefore: 5 1/2" x 2 + 1 = 12" you will need your initial squares to be 12" in size.
(I hope I haven't confused anyone and don't be afraid to ask any questions.)
Choose your two fabrics. I have chosen 2 pieces 10" square in size. Place your fabrics right side together.

Using your pencil and ruler draw a line diagonally from corner to corner in both directions.
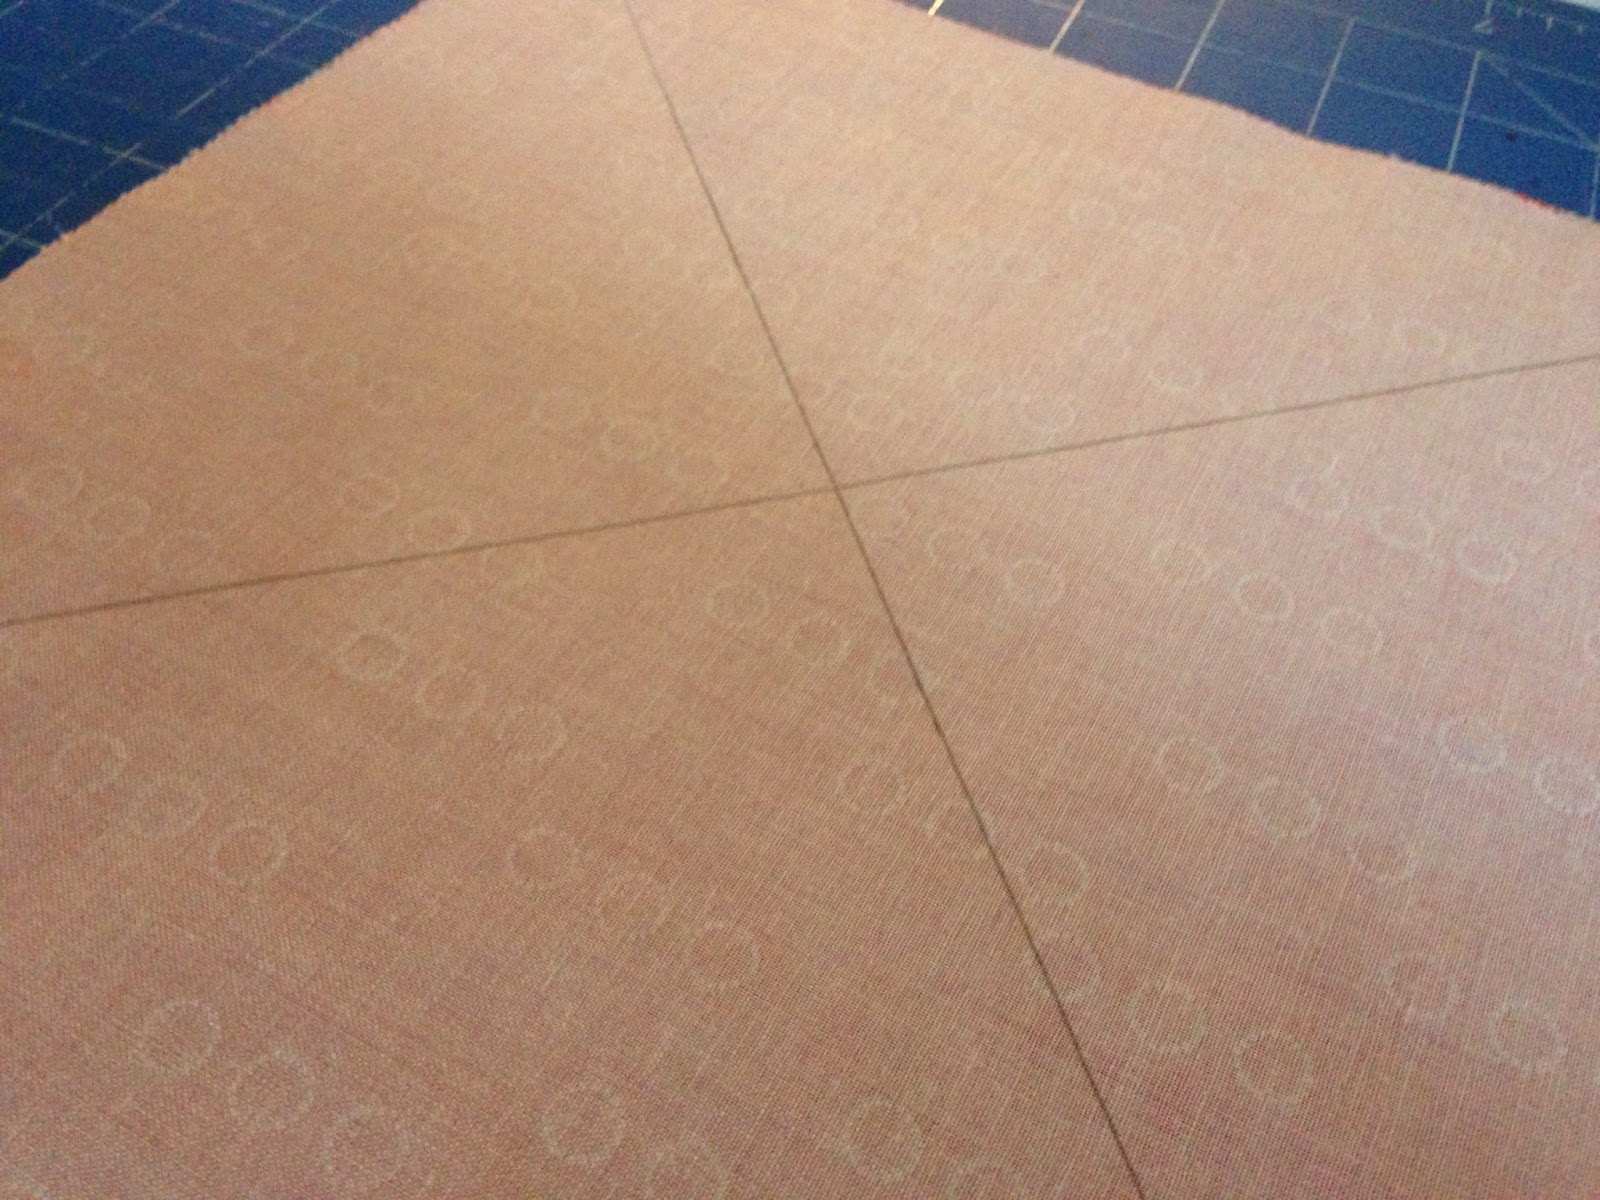
So that you end up with a cross through the centre.

Using your 1/4" foot sew a line on either side of the pencil line you drew.

Place the fabric onto your cutting mat square with the grid lines. Using your rotary cutter cut along both diagonal pencil lines, without moving the fabric off the mat.

Using the grid lines as a guide cut vertically through the centre and then again horizontally. Cut all lines without moving the fabric off your mat.


You will then end up with 8 Half Square Triangles.

Press seams open.

All you then need to do is to trim your squares to size. If you have measured accurately all you will need to do is cut off the dog ears.

Using 10" squares you will end up with eight 4 1/2" HST.


There are endless ways you can arrange you HST. I'm really liking these little pin wheels.
Hope you have enjoyed following this little tutorial and have some fun making HST.
Comments
Post a Comment